Sharpening the blades on your hand planer can really improve how well it cuts wood. This guide will walk you through the steps so you can get your planer blades razor sharp.
Before you start sharpening, you need to make sure the surface of your sharpening stone is completely flat. Any little dips or hills on the stone will mess up your sharpening job. Using a diamond sharpening stone is best since they stay nice and flat.
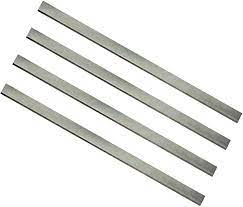
Once your stone is prepped, take the blades off your planer and clamp them into a honing guide. This guide holds the blades at just the right angle for sharpening. Check the instructions for your planner to see what angle they recommend. Wet the stone with some water – either splash it on with a spray bottle or fully immerse the stone.
Now comes the fun part – sharpening the blades! Pull the honing guide toward you across the stone in smooth strokes. Here’s a pro tip: after sharpening the full length of the blade, do a few extra strokes putting a little extra pressure on each side of the blade edges. This will prevent the corners from digging into the wood when you’re planing.
For the best results, start with a coarse grit stone first. Then move to a medium stone, and finish with a fine stone. Keep the honing guide steady and use consistent pressure as you stroke the blades across each stone. Staying flush to the stone guarantees the blades sharpen evenly. That’s why flattening the stone beforehand is so important.
Sharpening your blades really doesn’t take as long as you might think, especially if you do it regularly. Just remember that each time you sharpen, you’re removing a tiny bit of metal from the blades. So seeing some grey metal swarf on the stone is totally normal and expected.
In summary, learning to sharpen your own planer blades gives you sharper cuts, smoother planing, and more control over your woodworking. Follow these steps, use the right angle for your blades, and work your way up through the grits for a flawless finish.